Inspect the tool after a strike or entanglement
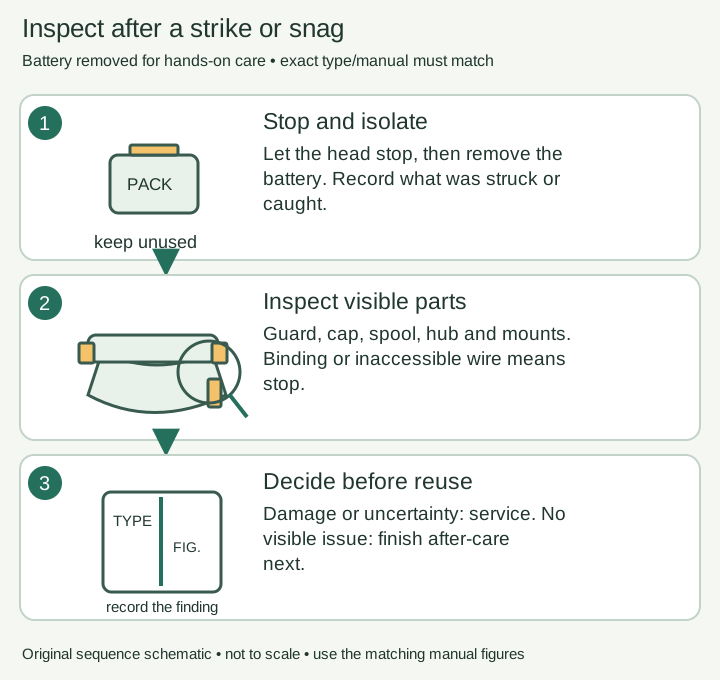
Stop after hitting or catching a foreign object and document external damage before deciding whether service is required.
Version 2.0.0. Required observations are marked *. Your answers stay in this browser.
1. Match the model and parts
Remove the battery. Find LST300 and the adjacent type number on the tool label. Compare the guard, cap, spool and assembly figures with the linked LST300 manual. Use ServiceNet for your exact type if they differ. LST300 is not a bump-feed head.
Region: US
Parts: Automatic-feed head with AF-100 spool; match model and tool type to manual
Not covered: LST420 / LSTE525; GH corded models; Dual-line heads; Metal line or blades; Nonmatching tool type or modified head; Unknown tool type or missing exact-type manual; Bump-feed conversion.
Choose the versions you can confirm.
Compare versions →2. Prepare
Keep the battery removed if the exact type/manual match is unknown or parts differ from the figures. Stop for a damaged battery, exposed wiring, a faulty switch, cracked guard, broken spool/hub, damaged cap tabs or housing slots. Use an authorized service center. Never open the battery, motor housing or charger.
Consumables and fit
No replacement consumable is required for this check. Damaged parts need an exact-type match through manufacturer support.
3. Follow your checks
Match the model and preparation to start.
Read all possible routes
Is the battery removed, the trigger released and the cutting head stopped, with no battery damage, exposed wiring or faulty switch?
- Yes — Keep the battery removed for every hands-on step.
- No — Stop using the tool for electrical, battery or switch damage. If you have only omitted battery removal, make the tool safe before restarting.
- Not sure — Keep the battery removed. Save your preparation record and check the matching manual before continuing.
Have you matched the label LST300 AND its exact tool type to the official lookup manual and its figures, with the original AF-100 automatic single-line head?
- Yes — Record the label type and matching manual reference in the first step.
- No — An unknown type, unavailable type manual, different figures, bump-feed head or dual-line conversion blocks this procedure. Use manufacturer support to identify the correct instructions.
- Not sure — Keep the battery removed. Save your preparation record and check the matching manual before continuing.
Has the head fully stopped and can the outside of the tool be inspected safely with the battery removed?
- Yes — Keep the tool unused during the inspection.
- No — Keep clear of any moving head or hazardous object and arrange safe assistance.
- Not sure — Keep the battery removed. Save your preparation record and check the matching manual before continuing.
Is there no already-visible broken guard, hub, spool, switch or exposed wiring?
- Yes — Continue with a careful external inspection; absence of obvious damage is not proof of internal condition.
- No — The manual requires damage to be repaired before further operation; do not attempt a test run.
- Not sure — Keep the battery removed. Save your preparation record and check the matching manual before continuing.
4. Follow and record
Complete the checks before recording physical work. Follow steps in order.
Record the exact tool and make it safe
Release the trigger, let the head stop, engage the lock-off and remove the battery. Leave it removed throughout hands-on care. Keep fingers away from the sharp cutter on the guard. Read LST300 and the tool type from the label. Open the official model/type lookup and compare its manual and parts figures with your actual guard, single-line head and AF-100 spool. A readable model name alone does not establish the type. If the exact type manual cannot be obtained, or any figure differs, save a preparation record and stop.
Look for: The battery is physically separate from the tool; your label type and matching manual reference are written below.
Manual: Official model/type lookup instructions; type is beside or below the model numberRecord the event
Record whether the line struck or became entangled with an object and where contact occurred. Keep the battery out and note any previously observed sudden vibration, stop or control problem.
Look for: The incident and original symptom are preserved without another powered attempt.
Manual: English pp2–3 Safety; p8 Installing and removing the battery packInspect guard and retention
Look for cracks, missing material or displacement in the guard, spool cap and visible housing. Check both cap tabs and the guard mounting. A broken hub or spool means the tool must remain unused.
Look for: Visible retaining parts are intact or a specific damaged area is recorded.
Manual: English pp2–3 Safety; p8 Installing and removing the battery packInspect accessible movement and mounting
Look for visible misalignment, binding, broken parts and loose mounting. Do not pull on embedded wire, use force on a jam or open the motor housing. An object that cannot be freed safely needs service.
Look for: Any binding, misalignment or inaccessible entanglement is identified as a stop condition.
Manual: English pp2–3 Safety; p8 Installing and removing the battery packCheck the exterior and controls
Inspect the shaft, handle, collar and battery exterior without opening them. If the trigger previously failed to turn the trimmer on or off, the manual requires repair; do not reinstall the battery to reproduce that fault.
Look for: The record includes the control history and visible condition, rather than a powered switch experiment.
Manual: English pp2–3 Safety; p8 Installing and removing the battery packChoose the next action
Any damage, binding or uncertainty calls for an authorized service center before further use. If the external inspection finds no issue, complete the after-care checks before choosing a normal-use observation; stop if a symptom appears.
Look for: The saved result identifies service needed or the remaining verification task, with no claim about unseen internal parts.
Manual: English pp2–3 Safety; p8 Installing and removing the battery pack
5. Keep your result
Record what you observed. A completed checklist does not certify that equipment is repaired.
When to check again
Immediately after a strike or entanglement
Stop immediately, remove the battery and check for damage; repair damage before further use.
Manufacturer guidance · English pp2–3 Safety; p8 Installing and removing the battery packSources & fit
- BLACK+DECKER LST300 instruction manual (manufacturer document, retailer-hosted)English p3 Damage to unit; Check damaged parts; Switch warning · Checked 2026-10-13
- BLACK+DECKER: locate a manual using model and type numberOfficial model/type lookup instructions; type is beside or below the model number · Checked 2026-10-13
- BLACK+DECKER LST300 product and supportLST300 model identity; Automatic Feed Spool; Includes AF-100 · Checked 2026-10-13
Independent, AI-assisted guidance. No physical repair trial is claimed. Manufacturer instructions for your exact version take priority.